
Learn how to set up and install Google Analytics on your website. Discover its benefits for tracking, improving, and growing your online presence.
If you own a website, one of the most powerful tools you can use to improve it is Google Analytics. It helps you track who visits your website, what pages they view, how long they stay, and much more. Whether you run a blog, an e-commerce store, or a business website, understanding your audience is the key to growth — and Google Analytics provides that insight for free!
In this article, we’ll explain how to create your Google Analytics account, generate your tracking code, install it on your website, and why it’s so valuable for your online success.
Depending on the version you use (Universal Analytics or Google Analytics 4), your steps may differ:
3.1.1 Click Data Streams > Web.
3.1.2 Add your website URL.
3.1.3 Google gives you a Measurement ID (e.g. G-XXXXXXXXXX).
3.2.1 You’ll get a code starting with UA-.
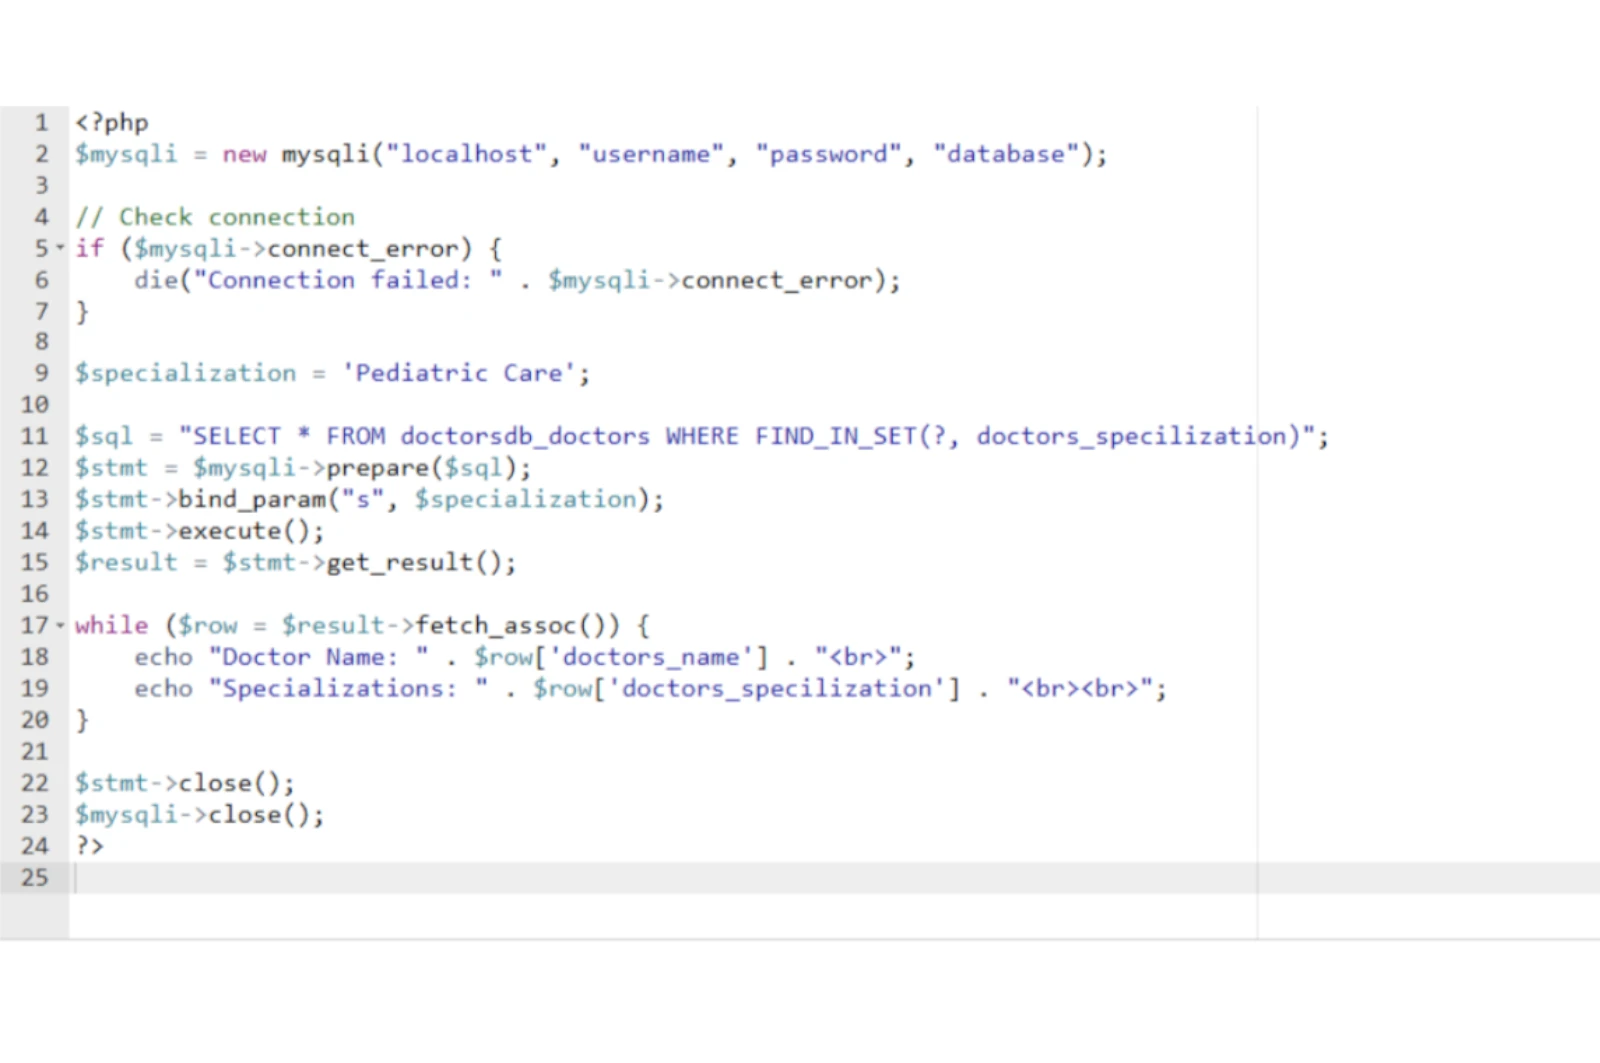
Paste the tracking code before the closing tag of your HTML file:
<head>
<!-- Google tag (gtag.js) -->
<script async src="https://www.googletagmanager.com/gtag/js?id=G-XXXXXXXXXX"></script>
<script>
window.dataLayer = window.dataLayer || [ ];
function gtag(){dataLayer.push(arguments);}
gtag('js', new Date());
gtag('config', 'G-XXXXXXXXXX');
</script>
</head>
Here’s why adding Google Analytics is a must for any website owner:
✔ Understand Your Audience — See who visits your site, their location, devices, and interests.
✔ Track Performance — Learn which pages perform well and which need improvement.
✔ Measure Traffic Sources — Know whether your visitors come from search engines, social media, email, or ads.
✔ Optimize Marketing — Identify the channels that bring the best ROI.
✔ Monitor Goals & Conversions — Track form submissions, product purchases, downloads, and more.
✔ Free & Powerful — Google Analytics offers incredible data insights without any cost.
✔ Custom Reports — Create tailored reports to focus on the metrics that matter most to your business.
✔ Real-Time Data — Watch users navigate your site live for immediate insights.
Adding Google Analytics to your website is one of the smartest moves you can make. It takes just a few minutes to set up — and the insights you’ll gain can transform how you grow your business, improve your content, and connect with your audience.
Don’t fly blind — install Google Analytics today and start making data-driven decisions for your website’s success!
(1) (0)

No comments